Table of Contents
Managing cloud infrastructure can be complex, but Google Cloud Instance Groups make it simpler. These groups allow you to manage a collection of Virtual Machine (VM) instances as a single unit, streamlining operations like scaling, healing, and deploying updates.
In the last blog we saw how to use the Google cloud console i.e Gcloud. Today let’s do a deep dive into Google cloud instance group and see how we can use GCloud console commands to create the Instance groups.
Let’s break it down step by step.
What Are Instance Groups?
An Instance Group is a collection of VM instances managed together. They help ensure that VMs with similar lifecycles and configurations can be handled as one unit.
There are two types of instance groups:
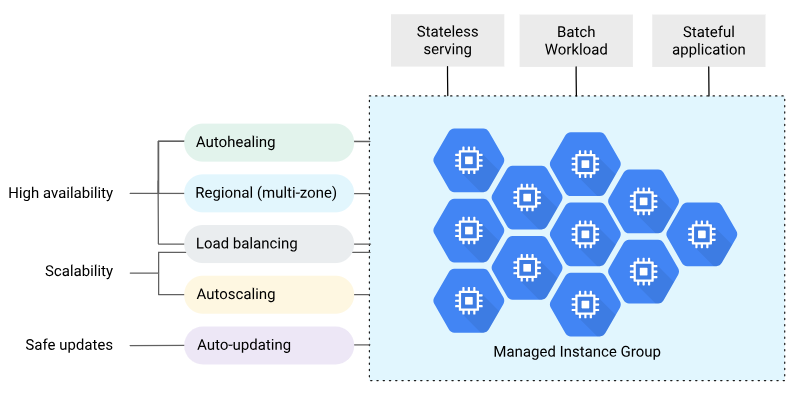
- Managed Instance Groups (MIG): These consist of identical VMs created from an instance template and include features like auto-scaling, auto-healing, and rolling updates.
- Unmanaged Instance Groups: These allow VMs with different configurations in the same group. However, they lack advanced features like scaling and healing and are generally not recommended unless you need a diverse VM setup.
Pro Tip: For most scenarios, use Regional Managed Instance Groups for higher availability as they distribute resources across multiple zones.

Key Features of Managed Instance Groups (MIG)
Managed Instance Groups simplify infrastructure management and improve reliability. Here’s what they offer:
- Auto Scaling: Automatically increases or decreases the number of VMs based on traffic or workload.
- Auto Healing: Detects and replaces unhealthy VMs using health checks.
- Rolling Updates: Gradually updates instances to a new version without downtime.
- Load Balancing: Integrates with a load balancer to distribute traffic effectively.
- High Availability: Regional MIGs create VMs across multiple zones, ensuring uptime even if one zone fails.
- Flexible Deployment: Supports gradual rollouts like Canary deployments to test updates with a subset of instances before applying them to all.
Creating a Managed Instance Group
To create a Managed Instance Group, you need an instance template. Here’s a simplified process:
- Create the Group:
Use the Google Cloud Console or command-line tool to create your MIG. - Set Auto Scaling:
Configure the number of instances based on metrics like CPU utilization or load balancer usage.
gcloud compute instance-groups managed set-autoscaling my-mig \ --max-num-replicas 10 \ --target-cpu-utilization 0.7 3. Add Health Checks:
Define a health check to monitor VM health and enable auto-healing.
gcloud compute instance-groups managed update my-mig \ --health-check=my-health-check --initial-delay 60Updating Managed Instance Groups
MIGs make updates seamless and reliable through:
- Rolling Updates: Gradually replace VMs with updated configurations while maintaining availability.
- Canary Deployments: Test new versions with a subset of VMs before a full rollout.
Example of a rolling update with minimal disruption:
gcloud compute instance-groups managed rolling-action start-update my-mig \
--version template=new-template \
--max-surge 1 --max-unavailable 0
Real-Life Scenarios
Here are some common use cases for MIGs:
- High Availability: Use regional MIGs to avoid zonal failures.
- Stateful Workloads: Preserve VM state (e.g., attached disks, metadata) for stateful applications.
- Self-Healing Applications: Configure health checks to replace unhealthy instances automatically.
Final Thoughts
Google Cloud Instance Groups, particularly Managed Instance Groups, provide a powerful way to simplify infrastructure management. They automate scaling, healing, and updates while ensuring high availability and reliability. Whether you’re hosting a web app or running large-scale workloads, MIGs are your go-to solution for cloud management.
